
How to transfer from a Keystore to a Recovery Phrase
If you’re an old Solflare user, meaning you created your first wallet on our old website: https://legacy.solflare.com/, there’s a good chance you are still managing access to your wallet using a Keystore file. With Solflare, we made the decision to transfer over to Recovery phrases in place of Keystores. This was driven by a few technical reasons.
A recovery phrase-based wallet uses a 12 or 24 words phrase, to generate private keys for multiple accounts.
This means it can derive an endless amount of them with the same 12 or 24 words instead of only supporting one like in the case of a Keystore file (aka JSON file) which is essentially created by encrypting the private key with a password of your choice.
In short, using Keystores limits us to one account per Solflare wallet, and also restricts what we can do in terms of interoperability.
Old Legacy users can easily migrate over to the new system — and this guide is here to walk you through the process. First, we show you how to create a new recovery phrase-based wallet and once that is set you will be importing your Keystore file and restoring it as an additional account in the newly created wallet.
Step 1
- Open a browser and search Solflare.com.
- From there download the Solflare browser extension by clicking Download.
Note: Chromium-based browsers as well as Firefox are supported, but for the best user experience we recommend Chrome or Brave browser.
Step 2
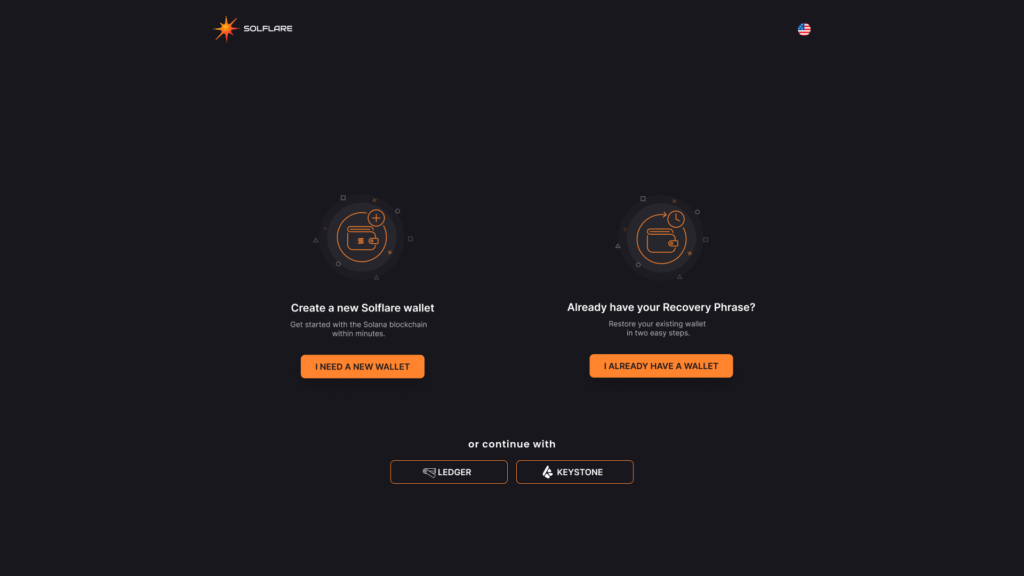
Once the browser extension is downloaded and installed let’s create a new wallet.
- Click I Need A New Wallet.
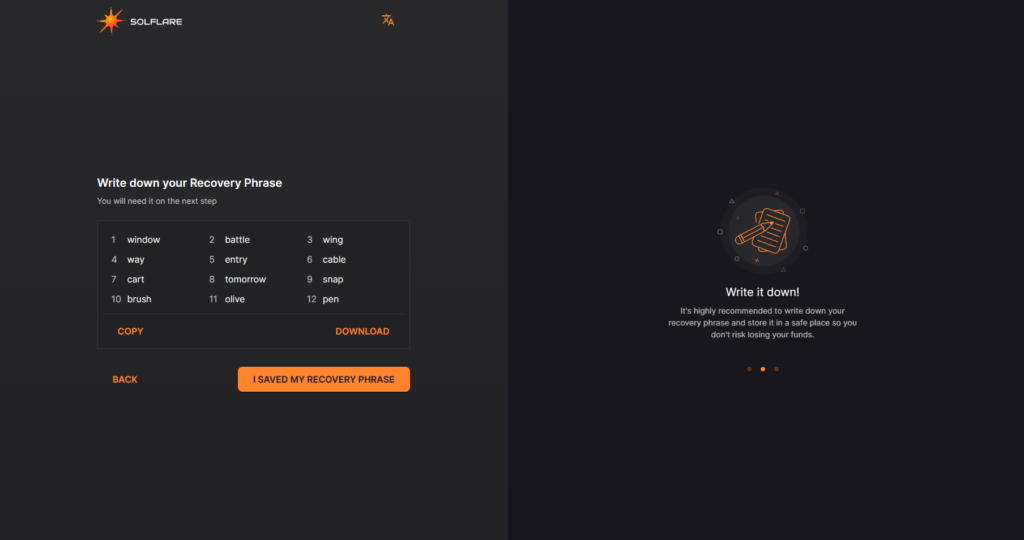
Step 3
- Write down your Recovery Phrase and store it in a safe location.
- Once you have done so, click I Saved My Recovery Phrase.
Note: You can download your Recovery Phrase as a .txt file but it is recommended that you encrypt this file immediately if you choose to download it.
⚠️ DO NOT share this phrase with anyone! These words can be used to steal all your accounts! ⚠️
Step 4
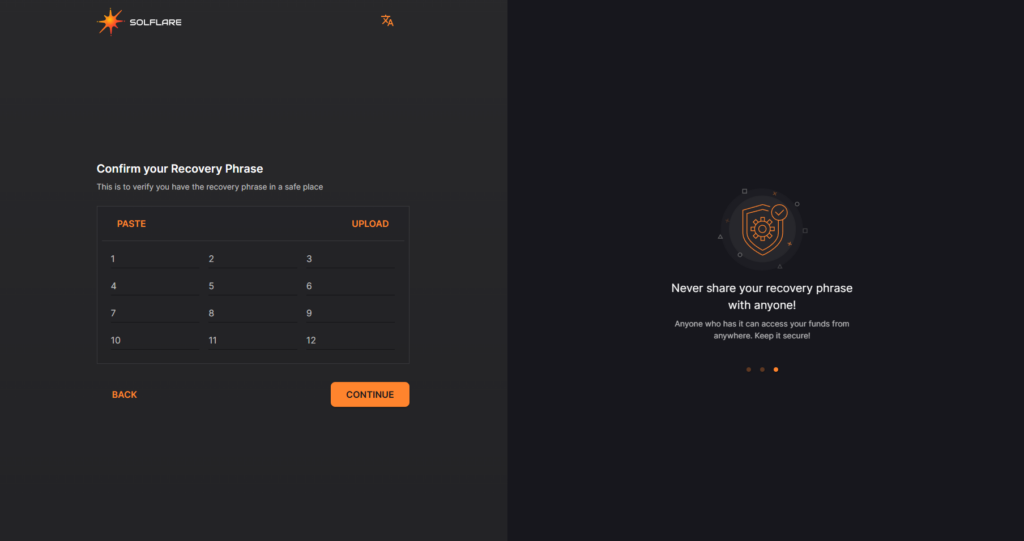
- Type in each word of your Recovery Phrase and click Continue.
Note: If you downloaded it as a .txt file, you can upload it here rather than type it in manually.
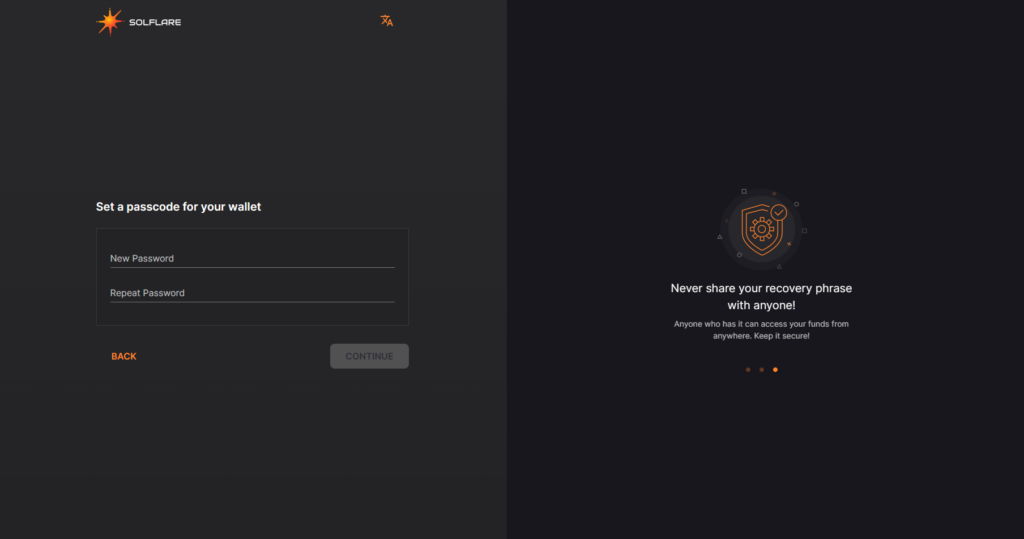
Step 5
Set a password for your new wallet. This step appears after you’ve confirmed your Recovery Phrase above.
- Set a Password.
- Click Continue when you’re done.
Step 6
You’ll now find yourself on the main Solflare dashboard.
- Click on the round icon left of the Settings gear symbol.
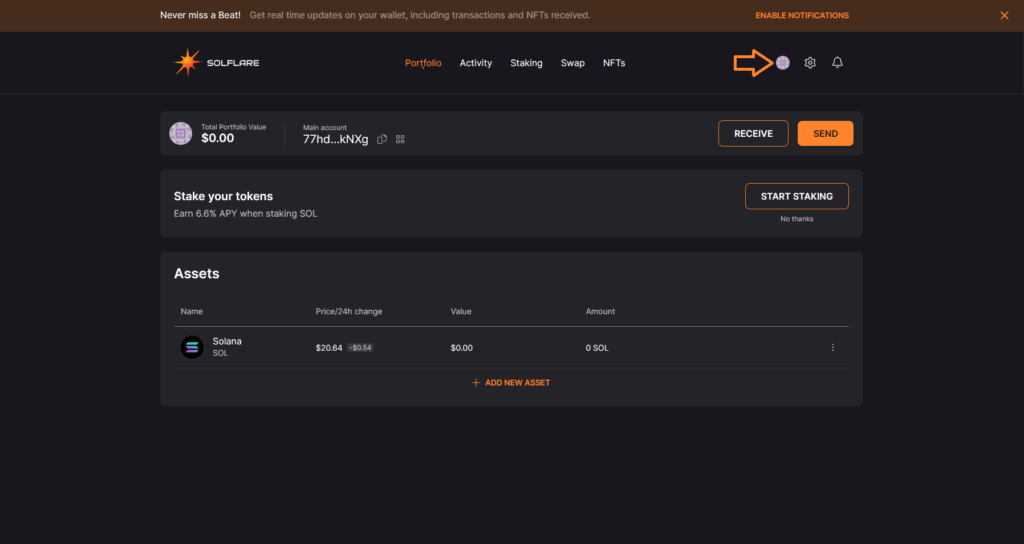
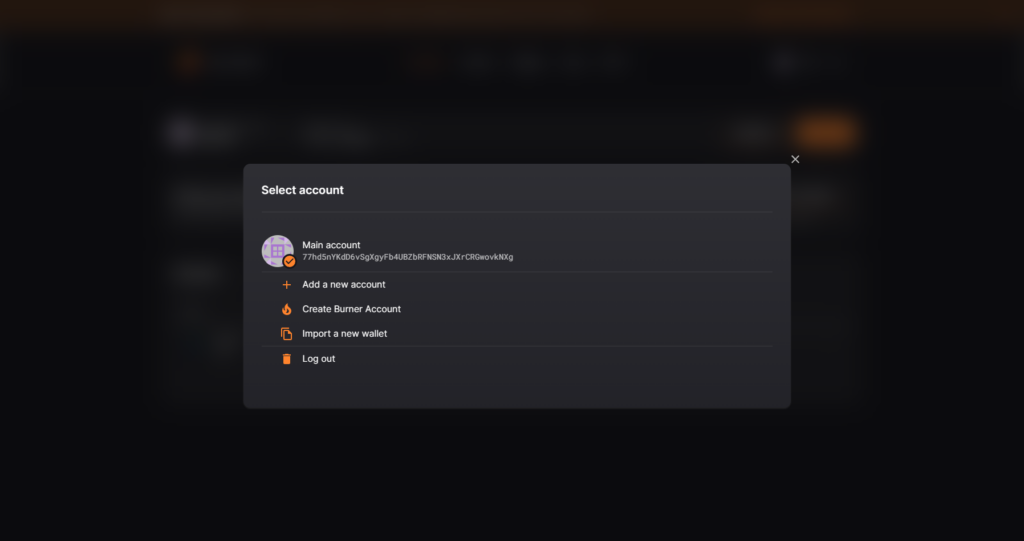
- The following list will appear under Main Account.
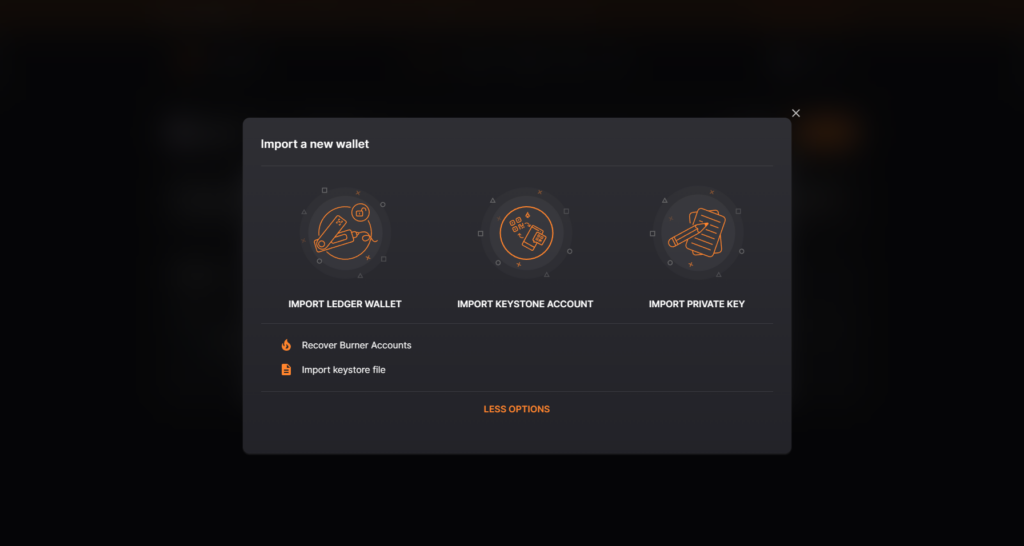
- Click Import a new wallet.
- On the next screen select MORE OPTIONS
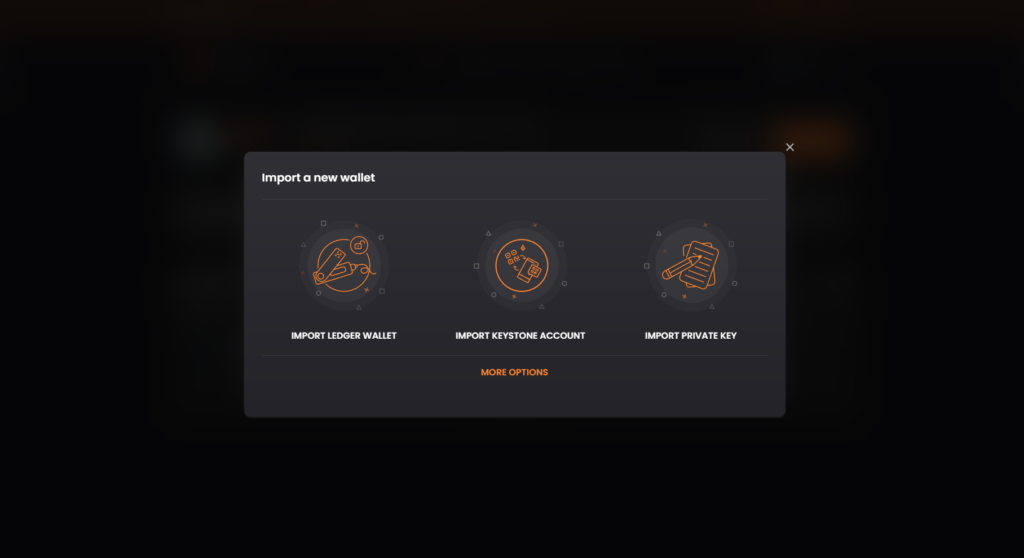
- Select Import keystore file
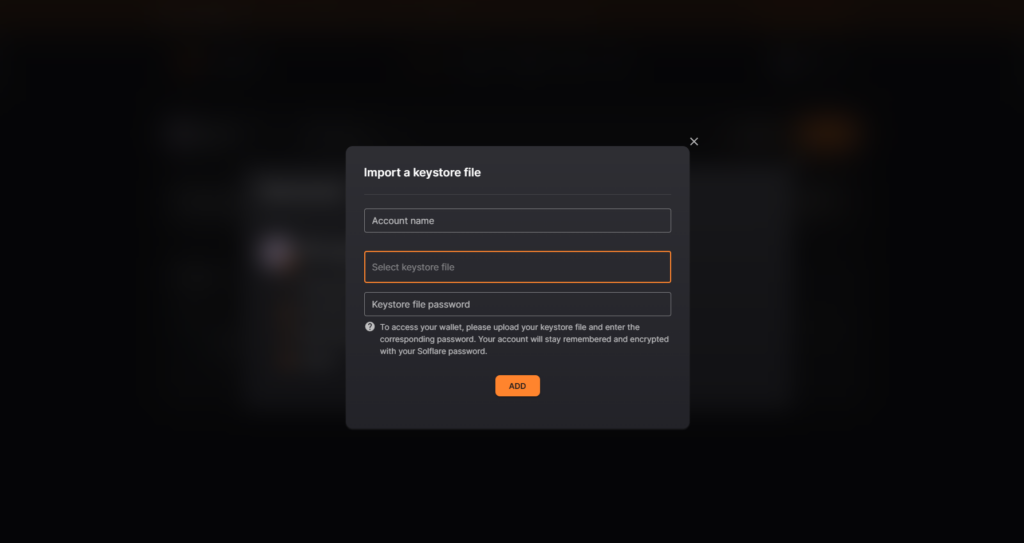
- Set the name you want for this account.
- Upload your Keystore file by clicking Select keystore file and then enter your Keystore file password.
- Click Add.
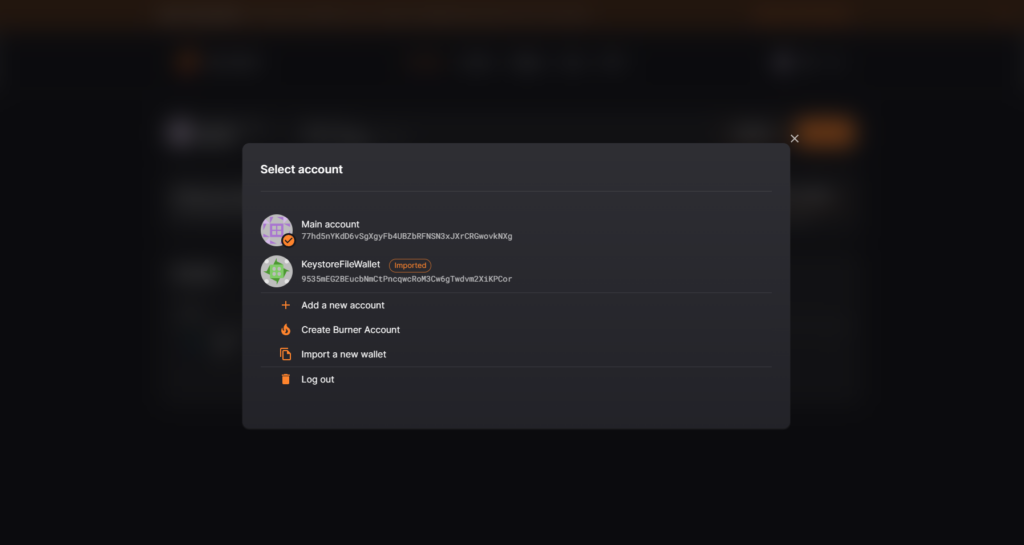
When you click Add, the Keystore account will appear in your list of accounts alongside your default Solflare account — you can now access it as normal!
You’re all set
Note: For a more convenient and secure experience moving forward, it’s recommended to transfer all the assets to the recovery-phrase account.
Once you do, it becomes crucial to store your recovery phrase safely as it’s the only way you can restore your wallet and its holdings.